Payroll Expense Transfer Process
Any questions regarding the Payroll Expense Transfer (PET) process should be sent to pmet@louisville.edu.
Consistent with other processes in PeopleSoft Financials (i.e. requisitions, payment requests, expense reimbursements), the process will now include online department approval. This process will use the existing department security structure in PeopleSoft Financials that is used for other department approvals (i.e. requisitions, payment requests, expense reimbursements). For those departments that utilize Business Operations to process PET, Business Operations will continue to initiate the process, but approvals will now go the department approvers.
Backup must be attached to the document in order for it to process to the approval stage. The same guidelines apply here as with other documents in PeopleSoft Financials (i.e. type, size). You may attach more than one document.
You may add comments to the document.
This process is not connected to Workday HR. As such, you do not have to make any Costing changes in Workday prior to processing documents. Any funding changes made here will NOT flow to Workday HR so make sure the person in your area responsible for updating Costing in Workday is aware of any changes that need to occur going forward.
Before running the process, please login to BI to obtain your data:
1. Login to BI (requires ULink login).
2. Run the Pay History report (or current fiscal year): Home > HR > UBM > Pay History - FY23
To run it for this purpose should require three or four parameters:
- Paycheck NBR: enter check number
- Show Chartfields: select NO
- Expense Type: select Salary
- Begin and End Date: are only necessary if the check has already been processed and you are requesting a new Payroll Expense Transfer on the check
PET Process:
1. Login to PeopleSoft Financials (requires ULink login).
2. Navigate to NavBar (top right corner) > Menu > U of L Custom > UL General Ledger > Payroll Expense Transfer
3.Enter Employee ID and Journal Date for existing check. NOTE: the page will not return any data without both pieces of information.
4. Click OK.
5. Click on Insert Transactions.
6. Click OK and then Refresh to retrieve the transactions. The system will retrieve all of the salary expenses for the check.
7. A Position Balance is shown at the top of panel. When you start, the overall balance is $0. Once you have completed each position, the overall check must balance to $0 in order to process the check.
8. As you look at the positions and distributions of the check, you will need to first decide which positions and associated distributions need to be reallocated. For those distributions that are not going to be reallocated, you will need to check the System Reversed box for each of those distributions. For those that you intend to reallocate, you will need to check the Reallocate box for each of those distributions.
9. Click on the '+' sign for the line you want to start the reallocation process.
10. Click the '+' sign on line 2 (Line Nbr 1, Seq Nbr 1) to open a row for inserting reallocation.
11. Insert the amount and speedtype for the transaction - this amount MUST include dollars and cents, i.e., 500.00 not 500.
12. Click Save.
13. The balance is now $0.
14. In order to submit the expense transfer for approval, you MUST include backup. Backup is the documentation indicating WHY the expense transfer is needed. To include backup, click on the Attachments near the top.
15. Click on Add to attach the documentation. You must include at least ONE document, but can attach multiple documents if needed.
16. If you are satisfied with the reallocation, click Save and then submit for processing by clicking the Submit for Approval. Notice that the Position Balances now also match.
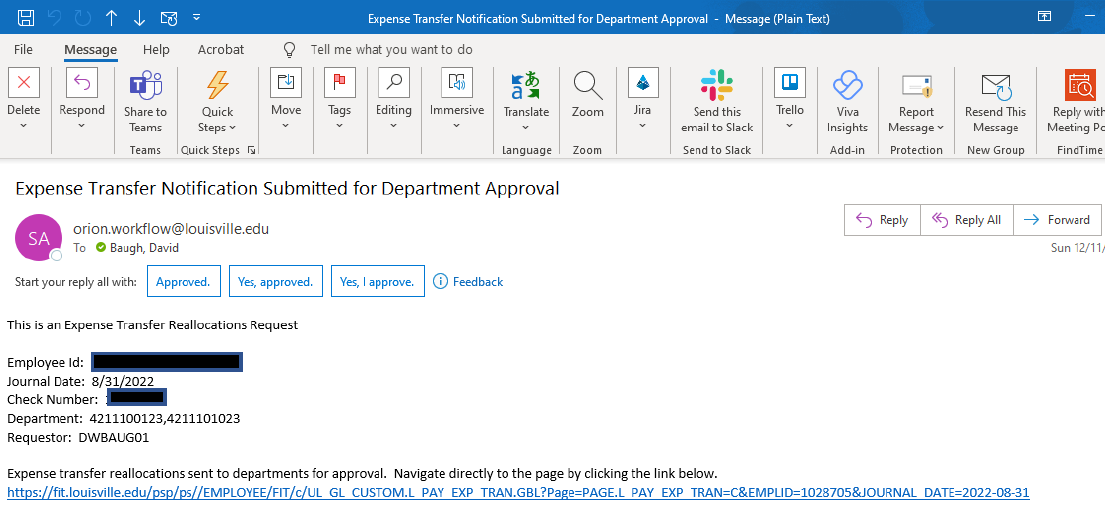
17. Emails will be sent to the approvers of the deptids listed on the document. The requestor will also receive an email.
PET Detailed Process - including reallocation and reversal:
1. Login to PeopleSoft Financials (requires ULink login).
2. Navigate to NavBar (top right corner) > Menu > U of L Custom > UL General Ledger > Payroll Expense Transfer
![]()
3. Enter Employee ID and Journal Date for existing check. NOTE: the page will not return any data without both pieces of information. If you are successful, you will get the following page:
4. Click OK (above pic).
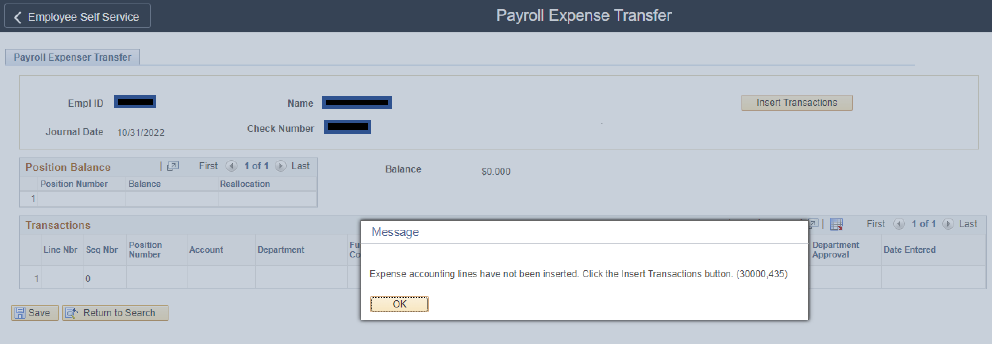
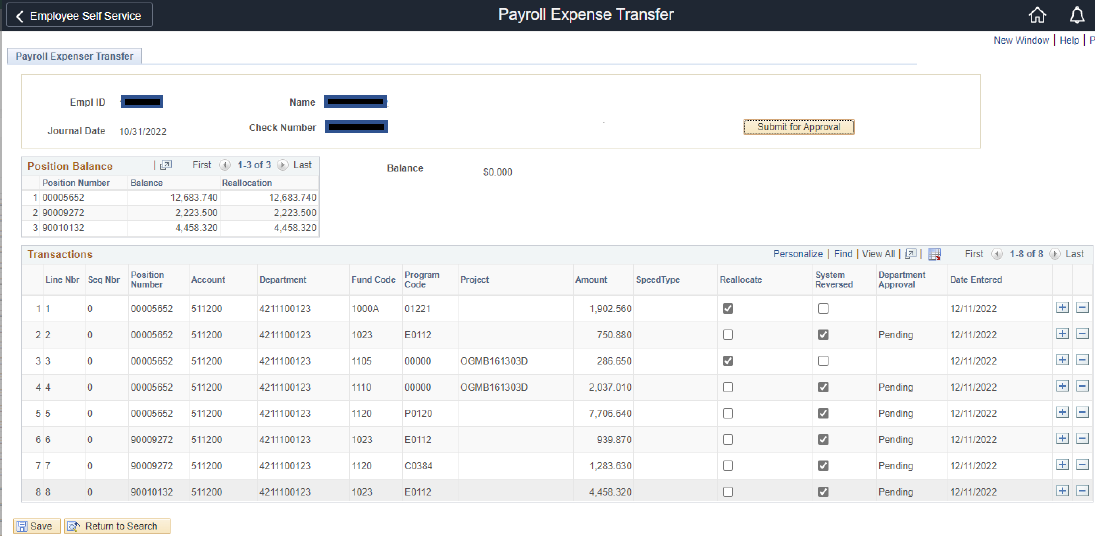
5. Click on Insert Transactions (above pic). System will respond with the following:
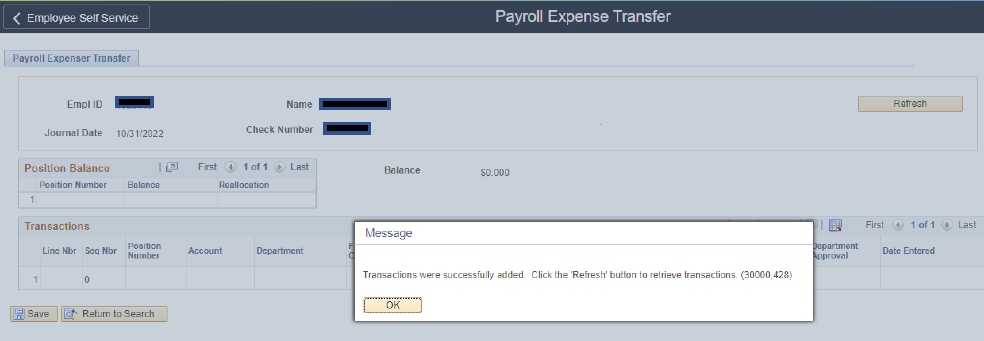
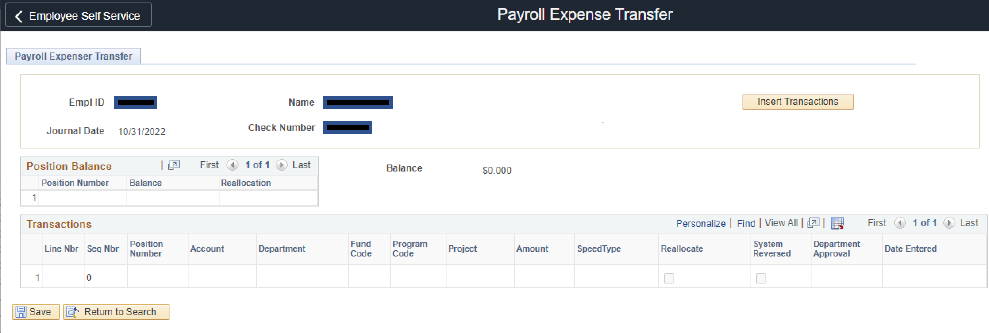
6. Click OK and then Refresh to retrieve the transactions (above pic). The system will retrieve all of the salary expenses for the check.

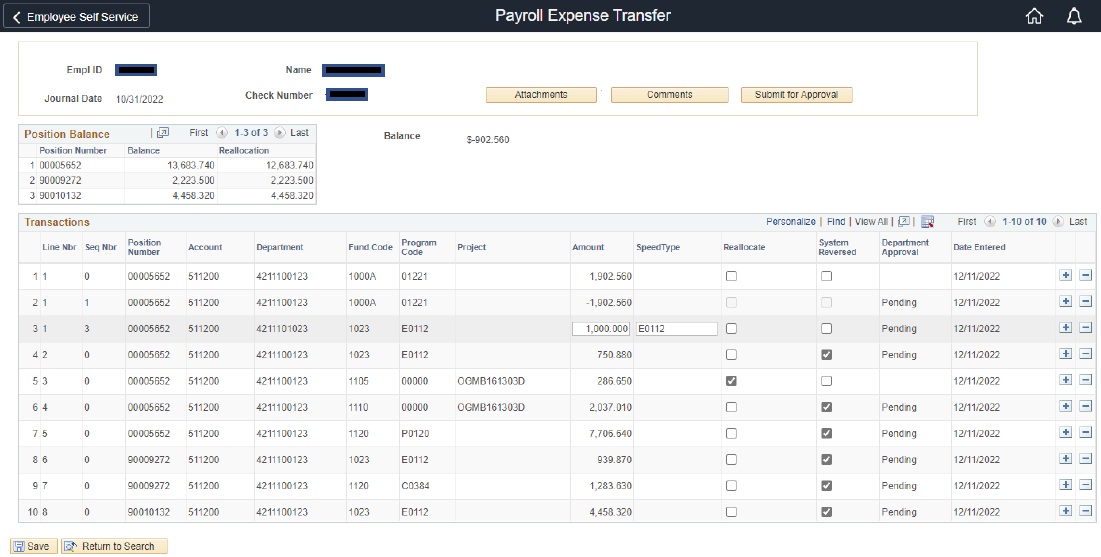
7. A Position Balance is shown at the top of panel. When you start, the overall balance is $0. Once you have completed each position, the overall check must balance to $0 in order to process the check.
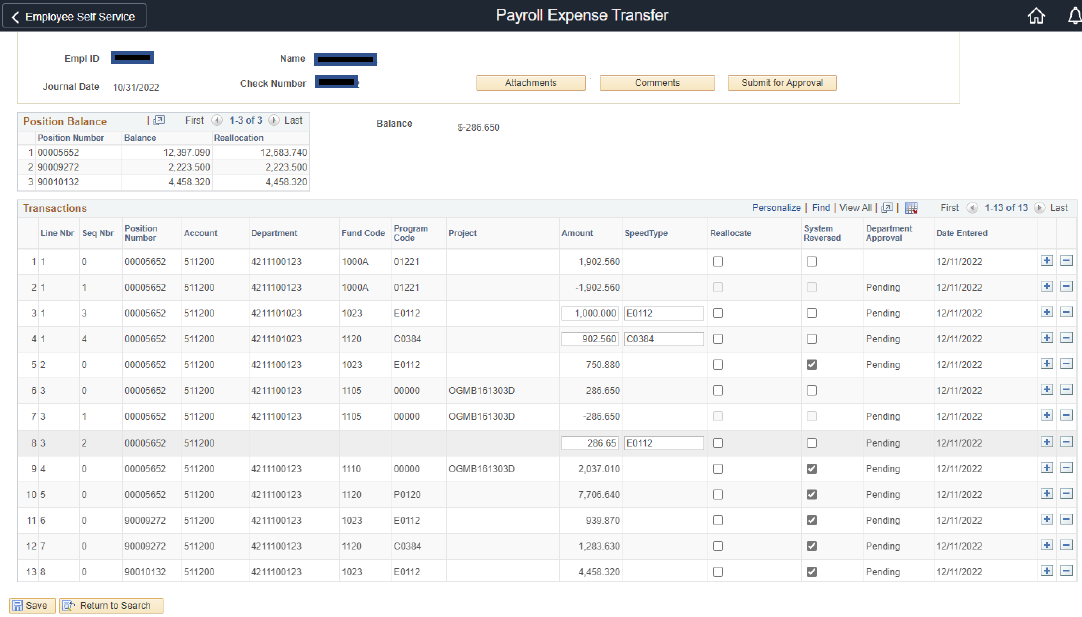
8. As you look at the positions and distributions of the check, you will need to first decide which positions and associated distributions need to be reallocated. For those distributions that are not going to be reallocated, you will need to check the System Reversed box for each of those distributions. For those that you intend to reallocate, you will need to check the Reallocate box for each of those distributions. In our example, we are reallocating lines 1 and 3 and reversing 2, 4, 5, 6, 7, and 8.
9. For line 1, click on the '+' sign to start the reallocation process.
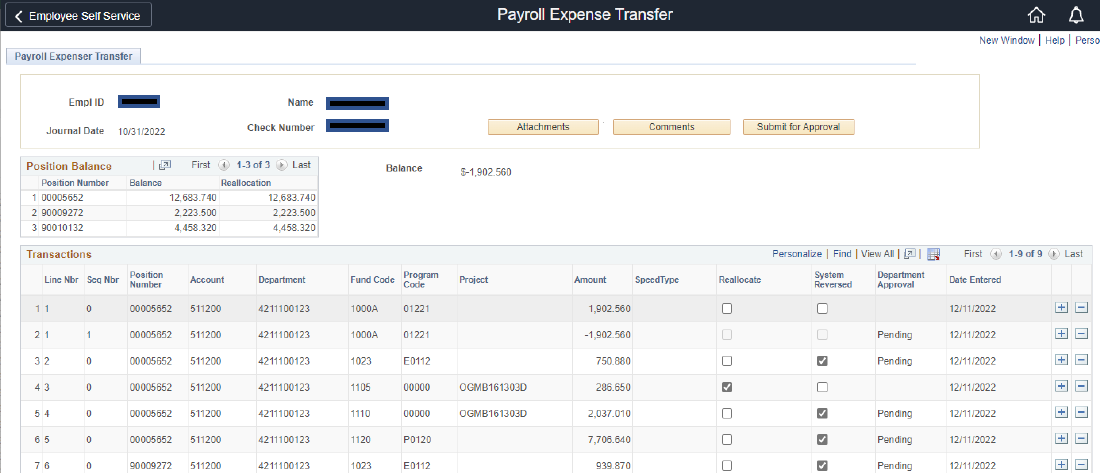
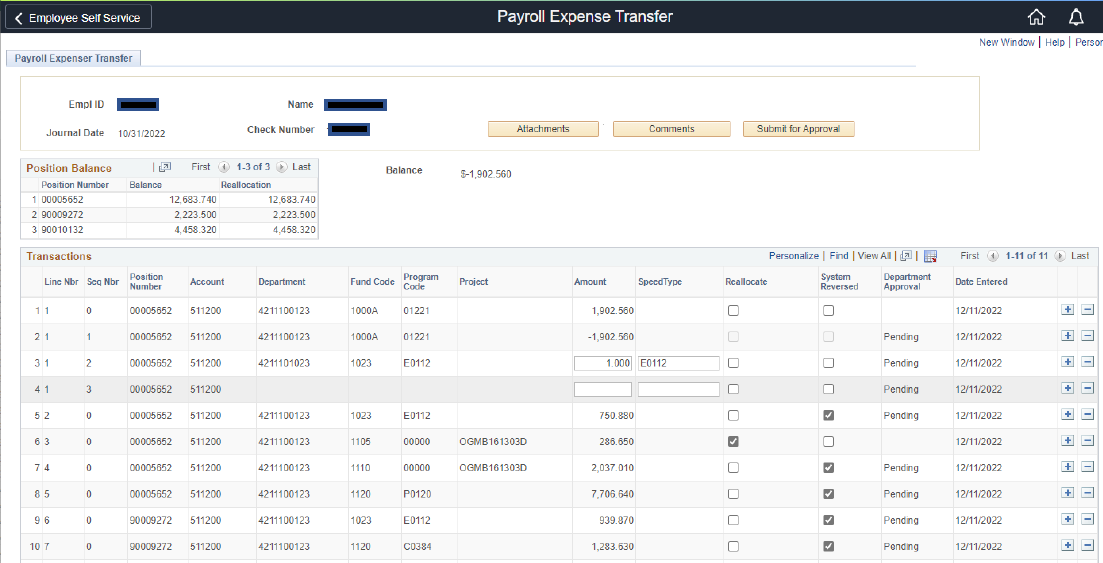
10. Click the '+' sign on line 2 (Line Nbr 1, Seq Nbr 1) to open a row for inserting reallocation.
11. We are going to split this transaction into two transactions. First, insert the amount and speedtype of the first transaction. The amount MUST include dollars and cents, i.e. 500.00 not 500.
12. Click Save. Notice that there is still a balance.
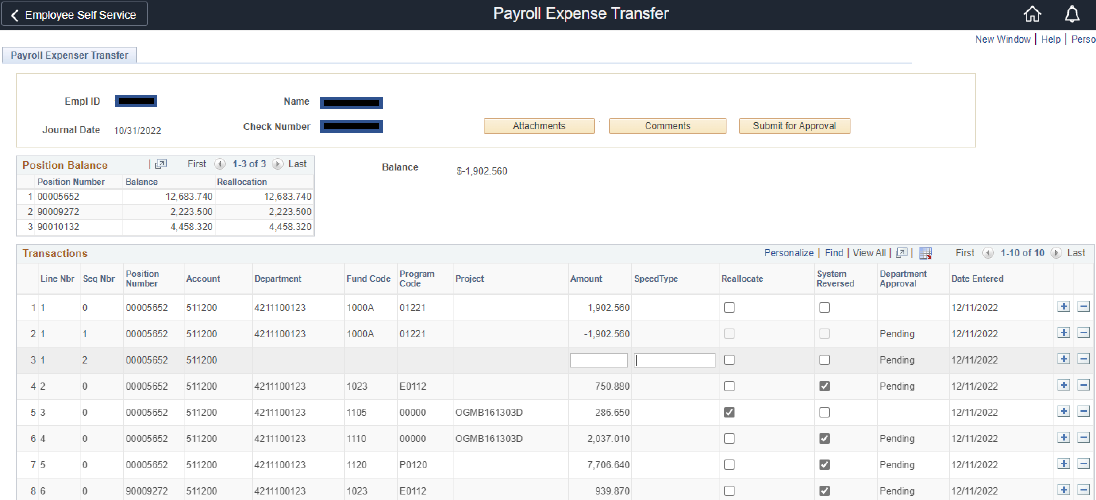
13. Click the '+' sign again on line 3 (Line Nbr 1, Seq Nbr 2):
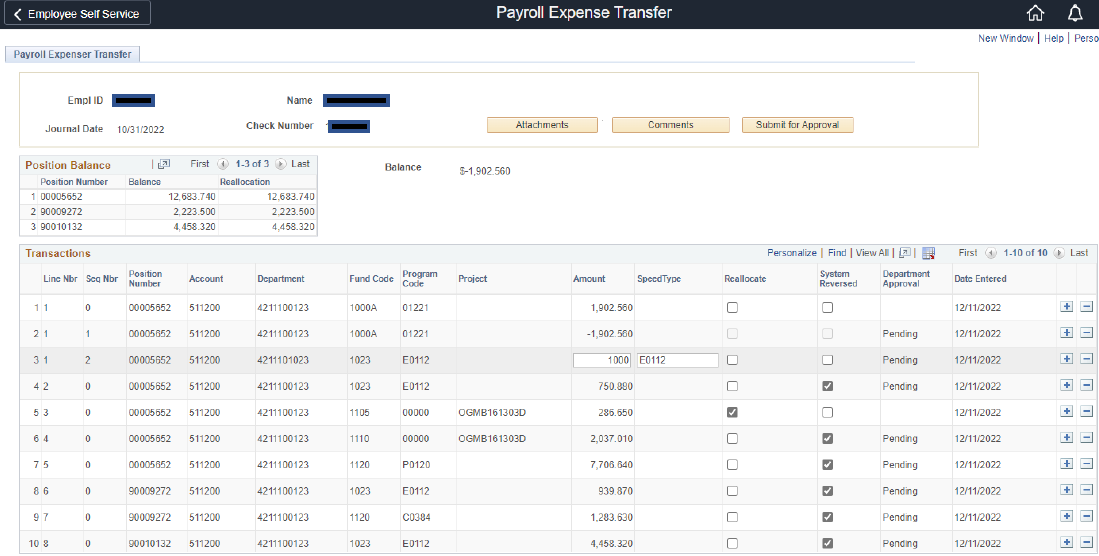
14. Enter the second reallocation:
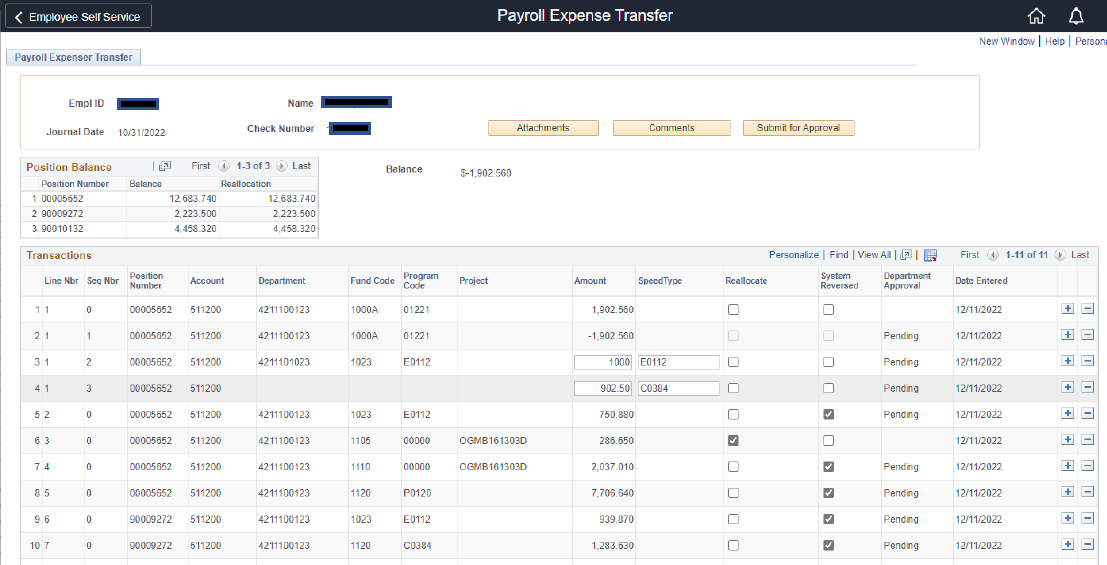
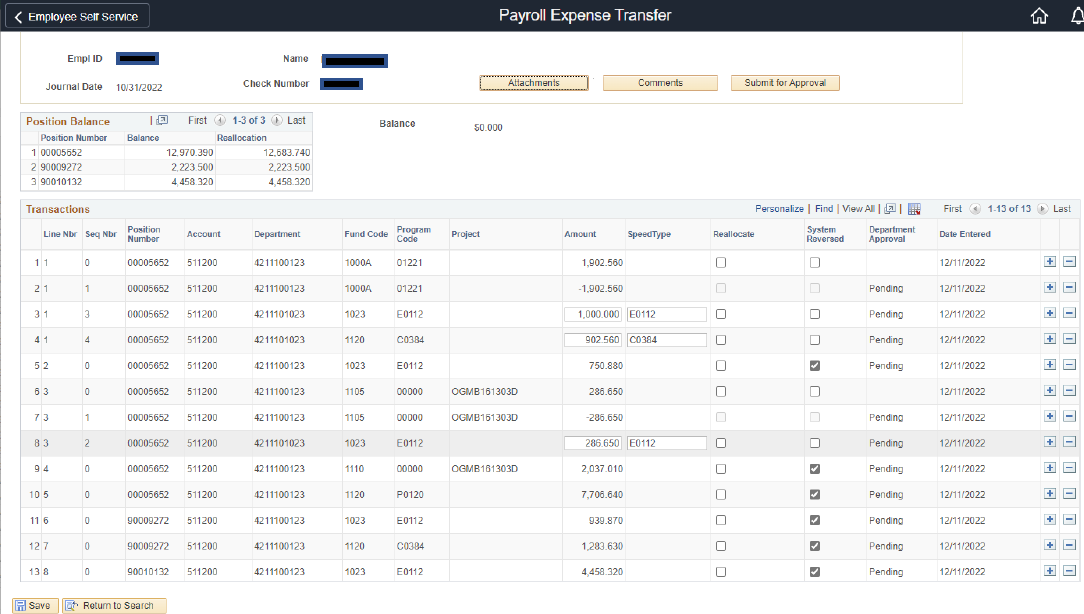
15. Click Save. The balance is now $0.
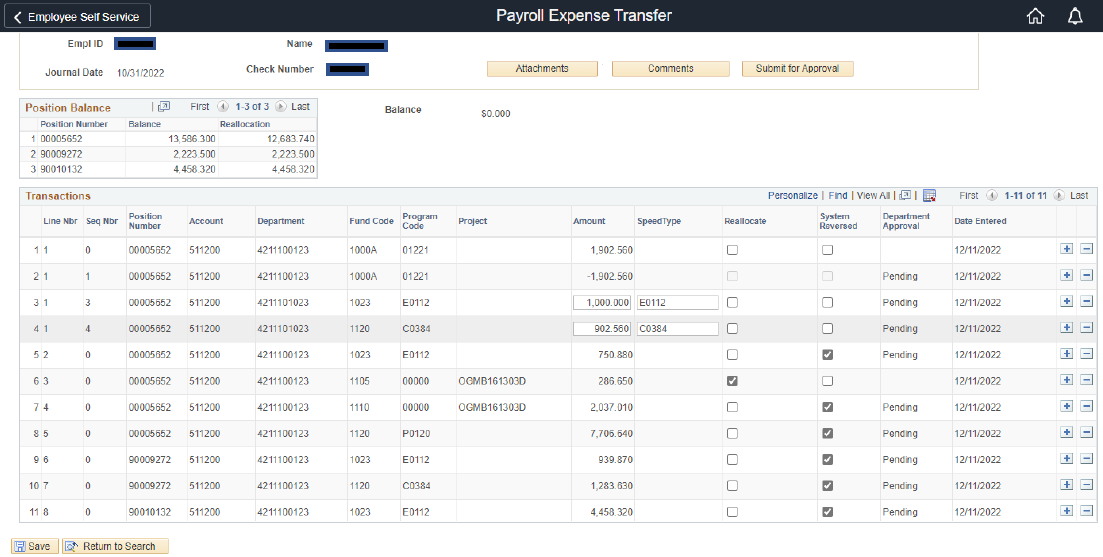
16. Repeat the steps for the second reallocation:
17. When you save, notice the balance is now $0.
18. In order to submit the expense transfer for approval, you MUST include backup. Backup is the documentation indicating WHY the expense transfer is needed. To include backup, click on the Attachments near the top.
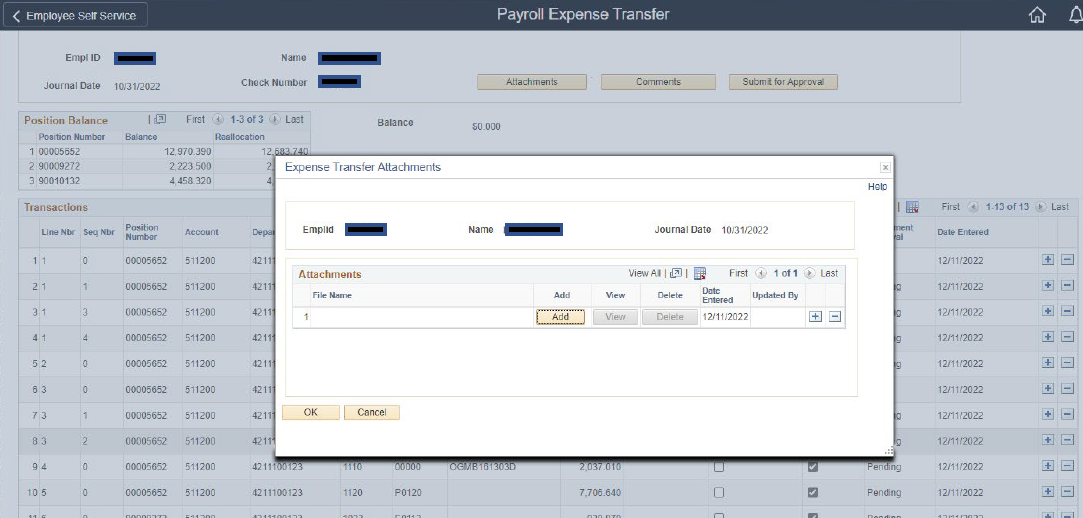
19. Click on Add to attach the documentation. You must include at least ONE document, but can attach multiple documents if needed.
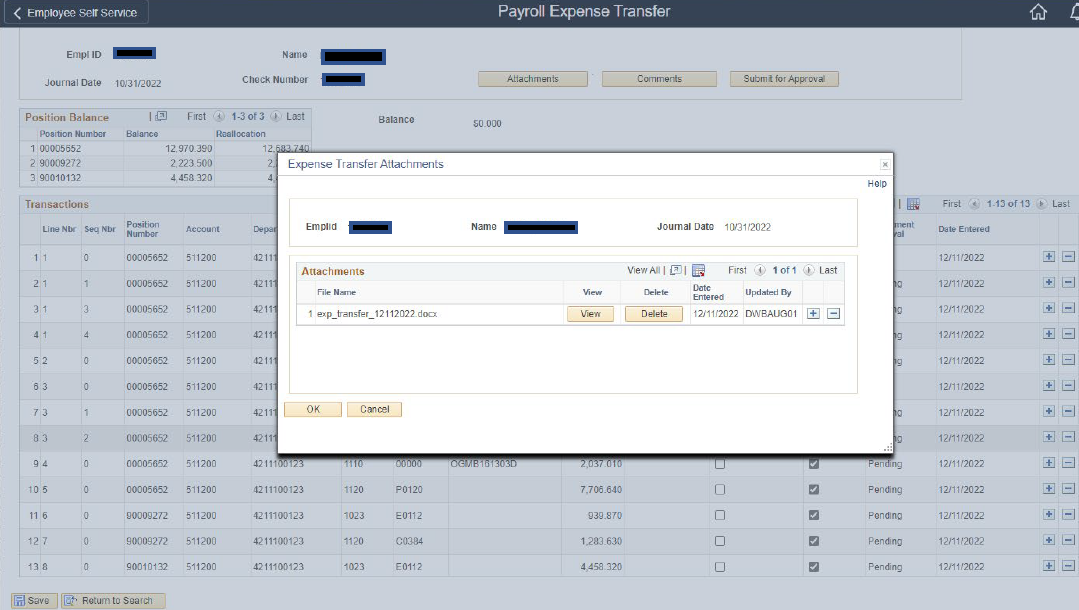
20. If you are satisfied with the reallocation, click Save and then submit for processing by clicking the Submit for Approval. Notice that the Position Balances now also match.
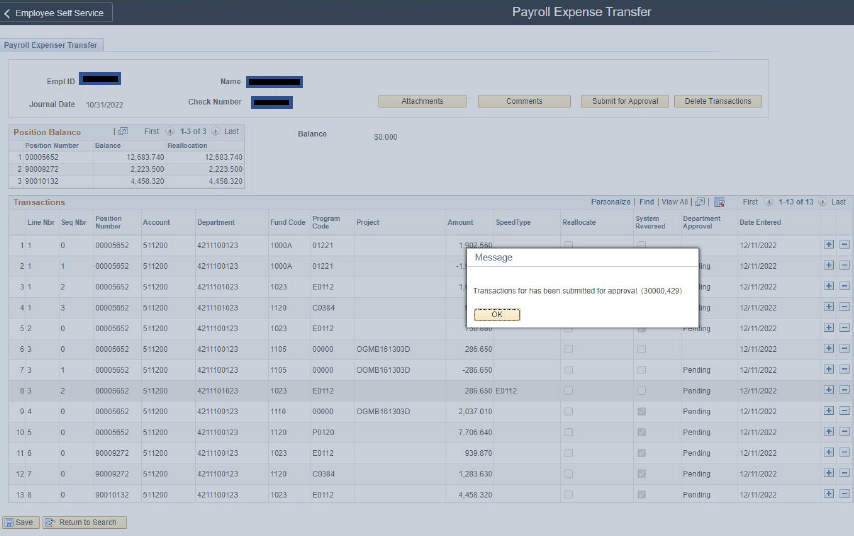
21. Emails will be sent to the approvers of the deptids listed on the document. The requestor will also receive an email: