Working with the Prime Time Marketing Theme
A tutorial on how to get the various pieces of the Prime Time Marketing Theme to work.
Theme Overview
Outlines each piece of the theme
The prime time marketing theme provides 3 levels of navigation and full portlet support. Hover over a section below to get more information and click to go to that section.
Site Title
How to set the site title
The site title that shows up all around the theme is set in the control panel under Site Setup -> Site
1) Click on Site Setup
2) Click on Site
3) Set the Site Title and click Save
Hero Banner
How to set the hero banner portlet and some boilerplate code to make it work.
1) Prepare Your Images
You will need to prepare 4 banners that are 800x340 pixels and 4 thumbs that are 100x78 pixels with all images in the PNG format. Create a folder somewhere on your site to house your banner images and upload them all as image objects. After they're all uploaded they need to be renamed to a certain name. Click on your first banner and then Actions -> Rename
Change the short name of your image to banner-0.png
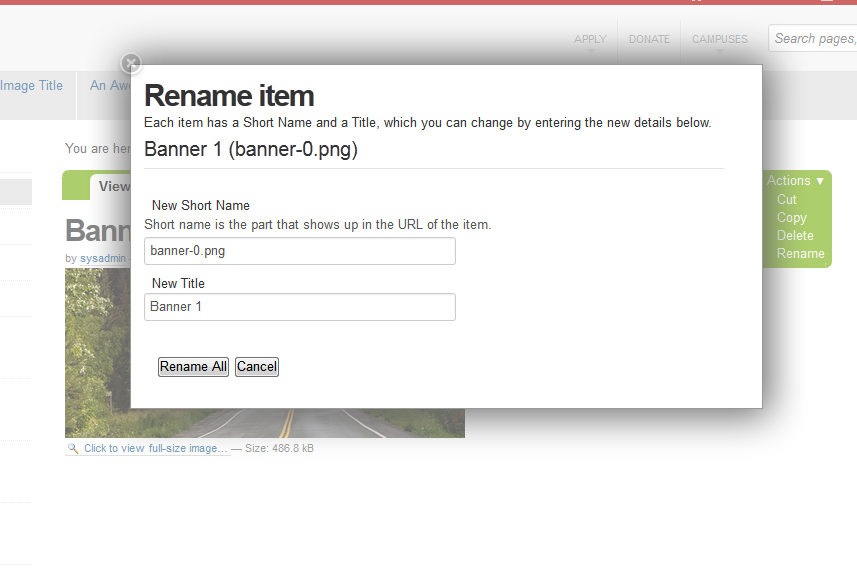
Repeat this process for your other banners, incrementing the number each time (banner-1.png, banner-2.png, banner-3.png)
The thumbnails get a similar treatment - rename each thumbnail, starting with the first one as banner-0_thumb.png and the rest as banner-1_thumb.png, banner-2_thumb.png, banner-3_thumb.png.
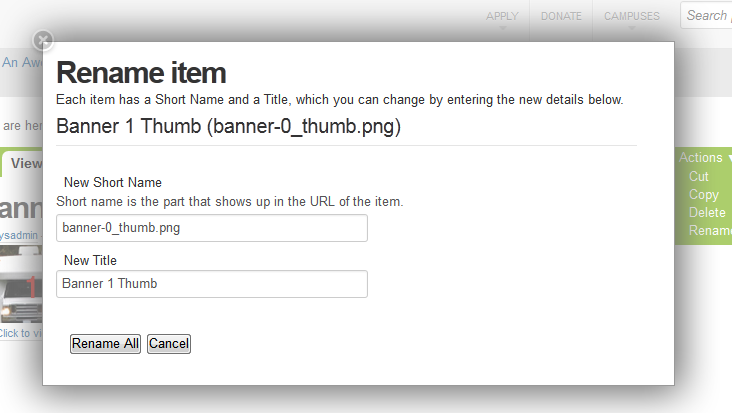
After you have renamed all of your files be sure to publish the folder that you created to house the images externally and then exclude it from navigation
2) Click on your home link and then Manage Portlets
3) Add a Bootstrap Row portlet to the hero section of portlets
4) Edit this portlet without the visual editor
5) Name the portlet "marketing_banners" and use the boilerplate code below to create your set of banners. When you're finished click save on the portlet dialog.
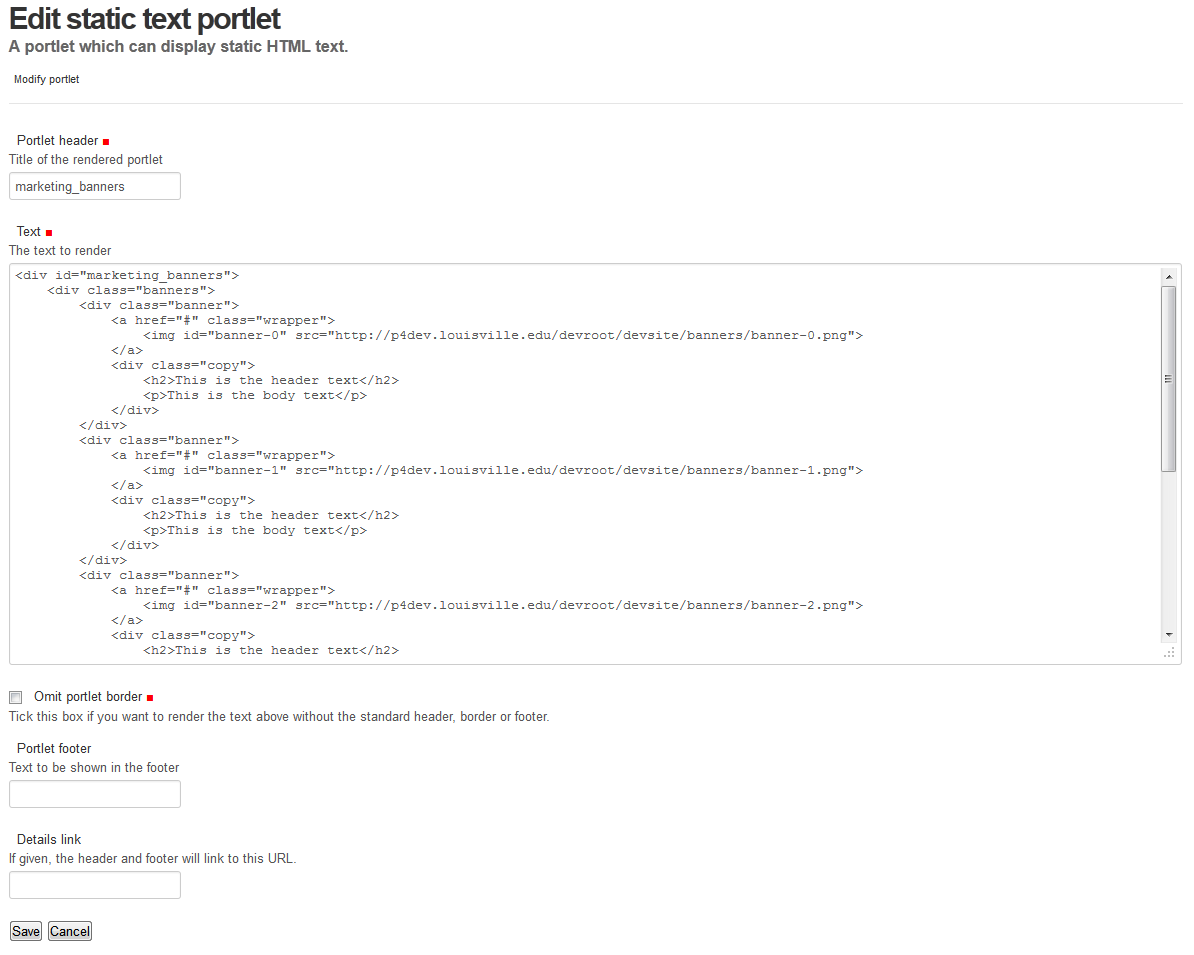
<div id="marketing_banners">
    <div class="banners">
        <div class="banner">
            <a href="#" class="wrapper">
                <img id="banner-0" src="/yoursite/banners/banner-0.png"  alt=""/>
            </a>
            <div class="copy">
                <h2>This is the header text</h2>
                <p>This is the body text</p>
            </div>
        </div>
        <div class="banner">
            <a href="#" class="wrapper">
                <img id="banner-1" src="/yoursite/banners/banner-1.png"  alt=""/>
            </a>
            <div class="copy">
                <h2>This is the header text</h2>
                <p>This is the body text</p>
            </div>
        </div>
        <div class="banner">
            <a href="#" class="wrapper">
                <img id="banner-2" src="/yoursite/banners/banner-2.png"  alt=""/>
            </a>
            <div class="copy">
                <h2>This is the header text</h2>
                <p>This is the body text</p>
            </div>
        </div>
        <div class="banner">
            <a href="#" class="wrapper">
                <img id="banner-3" src="/yoursite/banners/banner-3.png"  alt=""/>
            </a>
            <div class="copy">
                <h2>This is the header text</h2>
                <p>This is the body text</p>
            </div>
        </div>
    </div>
    <div class="pager" id="marketing_banners_pager">
    </div>
</div>
You need to change the items in red to be the URL to your images and the header/body text to be what you want to show on the homepage. Use relative URL's so it doesn't matter whether you're at stage.louisville.edu or louisville.edu.
Main Blockquote
How to create the main blockquote portlet for the homepage
The main blockquote is created as a static text portlet assigned to the homepage object.
1) Click on your home link and then Manage Portlets
2) Add a static text portlet to the hero portlets
3) Name the portlet "blockquote" and type in what you want the blockquote to say
4) Save the portlet
Spotlight Portlet
How to set the spotlight portlet
The spotlight is created as a static text portlet assigned to the homepage object.
1) Click on your home link and then Manage Portlets
2) Add a static text portlet to the right column
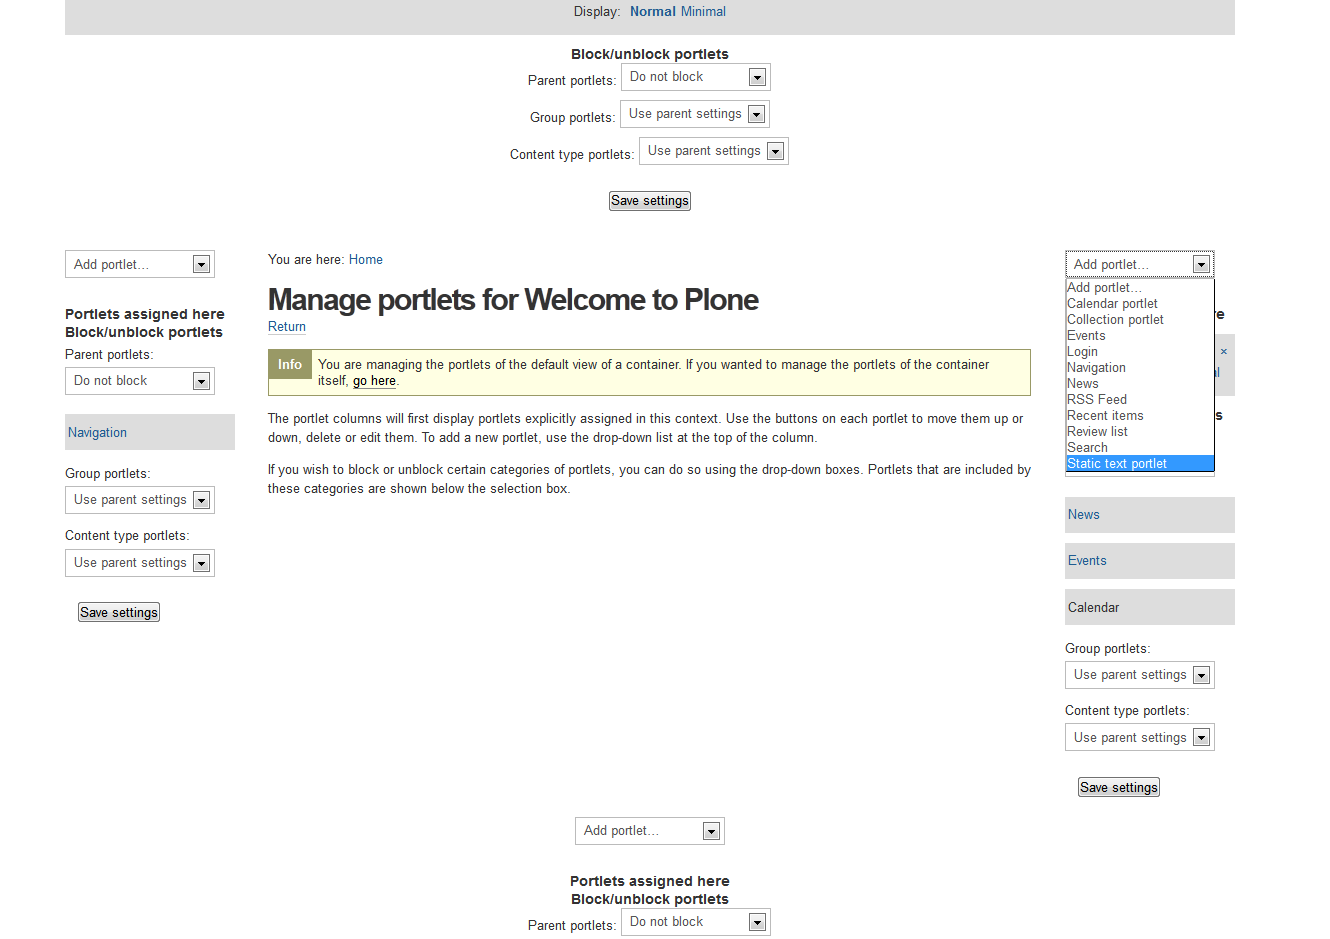
3) Name the portlet "spotlight" and type in what you want the spotlight to say - this can be just text or can be formatted html and include images
4) Save the portlet
Content Area
How to create the tabbed interface for the content area
Create a page in the root directory and copy/paste the code below onto it. Make the page the default view of the folder using the Display tab. This box will display below the middle portlets and above the prefooter.
<div>
 <div class="tabs-left tabbable">
  <!-- Nav tabs -->
  <ul class="nav-tabs nav" role="tablist">
  <li role="presentation" class="active"><a href="#item1" aria-controls="item1" role="tab" data-toggle="tab">item1</a></li>
  <li role="presentation"><a href="#item2" aria-controls="item2" role="tab" data-toggle="tab">item2</a></li>
  <li role="presentation"><a href="#item3" aria-controls="item3" role="tab" data-toggle="tab">item3</a></li>
  </ul>
 <!-- Tab panes -->
 <div class="tab-content">
  <div role="tabpanel" class="active tab-pane" id="item1"><p>Text for Item 1</p>
  </div>
  <div role="tabpanel" class="tab-pane" id="item2"><p>Text for Item 2</p>
  </div>
  <div role="tabpanel" class="tab-pane" id="item3"><p>Text for item 3</p>
  </div>
 </div>
</div>
Setting the Prefooter
Boilerplate code for the prefooter
The Prefooter is set as a bootstrap row portlet in the prefooter section of portlets
1) Click on your home link and then Manage Portlets
2) Make sure you're setting the prefooter for your entire site by defining the portlet at the site root. Click on the link in the middle of the page in the info box.
3) Add a Bootstrap Row portlet to the prefooter section of portlets
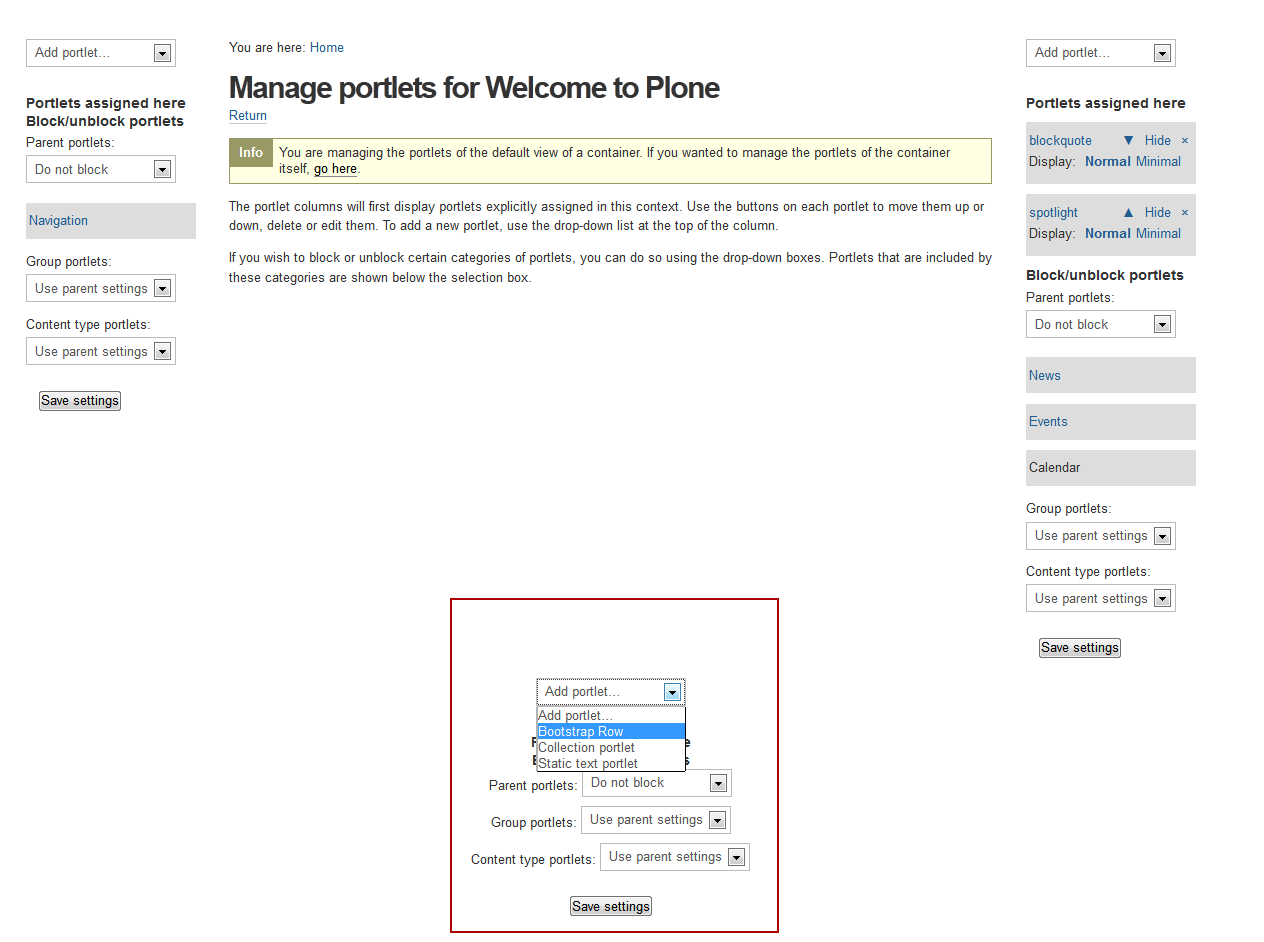
4) Edit this portlet without the visual editor
5) Name the portlet "prefooter" and use the boilerplate code below to create your prefooter. When you're finished click save on the portlet dialog.
<div class="span3">
    <div class="prefooter-well-wrapper">
        <p class="prefooter-header">Department Name</p>
        <p>University of Louisville</p>
        <p>Louisville, Kentucky 40292</p>
    </div>
</div>
<div class="span2">
    <p class="prefooter-header"><i class="icon-time icon"></i>Office Hours</p>
    <p>M-F 8:00am to 4:30 pm</p>
    <p>No holiday hours</p>
</div>
<div class="span2">
    <p class="prefooter-header short"><i class="icon-phone icon"></i>Phone</p>
    <p>tel (502) 852-6171</p>
    <p>tel (502) 852-5556</p>
</div>
<div class="span2">
    <p class="prefooter-header"><i class="icon-envelope icon"></i>Email</p>
    <p><a href="mailto:foo@bar.com">uoflocm@louisville.edu</a></p>
</div>
<div class="span3">
    <div class="row">
        <p class="prefooter-header span12"><i class="icon-comment icon"></i>Social Media
        </p>
    </div>
    <div class="row-fluid">
        <div class="span6">
            <a href="http://www.twitter.com/">Twitter</a>
        </div>
        <div class="span6">
            <a href="http://www.flickr.com/">Flickr</a>
        </div>
    </div>
    <div class="row-fluid">
        <div class="span6">
            <a href="http://www.facebook.com/">Facebook</a>
        </div>
        <div class="span6">
            <a href="http://www.pinterest.com/">Pinterest</a>
        </div>
    </div>
    <div class="row-fluid">
        <div class="span6">
            <a href="http://www.linkedin.com/">LinkedIn</a>
        </div>
        <div class="span6">
            <a href="http://plus.google.com/">Google+</a>
        </div>
    </div>
</div>
You need to change the items in red to reflect the information you need to put on the prefooter
